
Page 33
7.2 The Page Tab
The Page tab contains some basic properties for your website design, most of which
are common to all of the pages in your website. This is the only tab that is not divided
into Properties & Borders sub-sections. Under the Page tab you can edit only three
items: select elements to make visible/invisible on the page; set the page background
(color or image/bitmap slicer); and specify page centering. Page background and page
centering are normally the same for your whole website. Which elements are visible on
which pages can vary, depending on the type of content you're presenting on a
particular page.
───────────────────────────────────────
Setting Your Page Properties
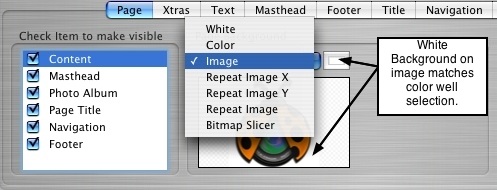
1. Check Item to make visible
You can choose to show or not show some of the elements on your pages, by simply
checking or unchecking the corresponding check boxes in the displayed list - Content
(Text Contents), Masthead, Photo Album, Page Title, Navigation, and Footer. As you
check or uncheck the boxes, you can see each element appear and disappear in the
viewer window. To keep certain pages unique, such as to display photo thumbnails
only, and no text content, you can add a new template and make the Content element
invisible for that template. Xtra box content has its own controls for adding and
removing individual boxes from pages, which we'll cover in the last section of this
chapter.
2. Page Background
The page background options let you set the color or use an image for the background
of your pages. You can keep the page background the way it is in the selected theme,
or you can change it to any color you want, or use an image as the background. If you
want to keep the current page background the way it is, don't do anything, just leave
the setting the way it is. To change the background for your entire site, click on the pop
up button to reveal the list of background options:
• To apply a White background, select White.
• To apply a colored background, select Color; then click on the color well to select a
color from the color palette.
• To use an image for the page background, select Image; locate the desired image
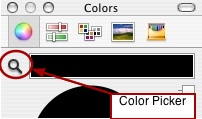
on your computer and drag and drop it into the image well. Note: the color that will
surround the image on the page, will be the background color selected in the color
well. Simply select the color that matches the background of your image (Tip: Use
the color picker tool shown below to get an exact match).
Repeating Images: these options are useful for tiling a graphic across your page to
create a patterned background. Repeat Image X means to tile the same image across
the X axis of your page (horizontally across the page). Repeat Image Y means to tile
the same image across the Y axis of your page (vertically down the page). Repeat
Image means to tile the same image across your entire page, both vertically and
horizontally. To repeat an image on your page background, locate the desired image
and drag and drop it into the image well. Then select from the repeat image options.
You will see the background changes take effect in the viewer window.
Bitmap Slicer: this option is very useful for adding creative backgrounds to your page
that allow you to easily slice a graphic that you have created in an illustration or
graphics program. Illustrators will find this tool especially helpful. The graphic is
dropped into the well and then sliced up in order to display at the top and bottom of the
page, and repeat the middle section in the body of the page. To apply the bitmap
slicing, select Bitmap Slicer from the pop up list; then locate the desired graphic on
your computer and drag and drop it into the image well. Set the height for the top and
bottom sections of your bitmap. The middle portion of your bitmap will automatically
repeat and adjust to the same size as your text and body content. You can see the
bitmap adjust in the viewer window as you adjust the corresponding section settings.
3. Page Centering
Page centering is used to center the page when the browser is resized during viewing.
The page/website will center accordingly inside of the browser window, shifting left
when the browser window is scaled down, or shifting right when the browser window is
pulled out or maximized. There are two options available for centering your website
pages: horizontal page centering and vertical page centering. Check the Center Page
Horizontally box to make your page center within the browser window from left to right.
Check the Center Page Vertically box to make your page center within the browser
window from top to bottom. You can center it both horizontally and vertically by
checking both boxes. Stretch the ShutterBug application window to view the page
centering. To remove centering, simply uncheck the box(es) and leave them blank.
───────────────────────────────────────