vi
Step 4. Preview & Export Your Website
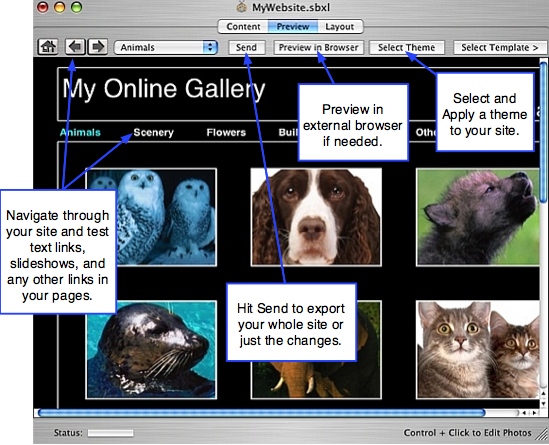
Click the Preview Tab on the main application window to open the Preview window.
The Preview window lets you apply a theme, customize pages with templates, web
preview your site, test your links, and export the site to the web or a folder on your
computer.
• Click the Select Theme button to open the built-in theme library.
• Peruse the various themes in each folder of the library (26 to choose from). When
you find something you like, select the theme thumbnail with your mouse and click
the Apply Theme button. A panel will slide out offering two options - click the Replace
Theme button to apply the selected theme to your website and return to the main
Preview window.
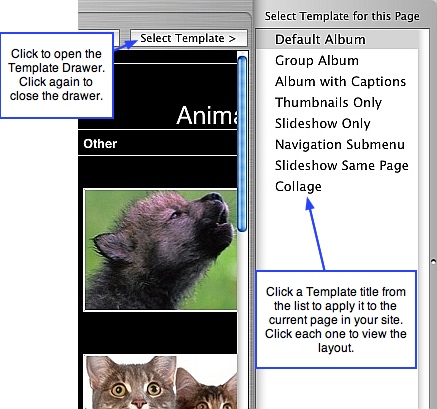
• Then click the Select Template > button. Select a template from the drawer to
customize the current page. Move to the next page in your site and choose another
template if desired, customizing different pages with different templates.
• Review your website, click through the navigation menu, test the links and slideshow.
• Click the Send button to export your website.
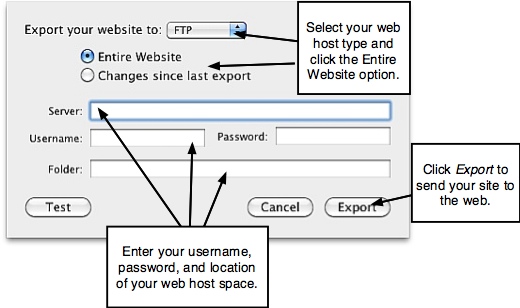
• The Export window will open. From the pop up list, select the web host type to
export to. Select Entire Website from the two export options below the pop up list.
• Enter your user specific web host information.
• Click the Export button to export your site to the specified location.
• The Activity Log window will open as ShutterBug calculates the HTML output.
• Then a small progress window will appear, informing you of the status of your upload.
• The next time you make changes to your site, simply hit the Send button from the
Preview window. ShutterBug will calculate the changes made and upload only those
changes.
• To Save & Close your ShutterBug file, go to File from the main menu, and select
Save. Then select Close.
• That's it, you're done! Go and check out your new site on the web.
───────────────────────────────────────