
Page 48
Chapter 9. The Theme Library
───────────────────────────────────────
ShutterBug's theme library includes 26 fully-customizable themes that contain 4-5
templates each. You can add and store your own creations in the theme library, delete
unwanted themes, rename them, as well as import and export themes for sharing with
others, plus a few other little gems. The interface makes it easy to organize your
themes, add your own unique designs, and store only the themes that you want to
keep. ShutterBug's theme library will make your projects even easier to manage than
before!
───────────────────────────────────────
Getting to Know the Theme Library Window
The theme library is accessible from the Preview window - click the Select Theme
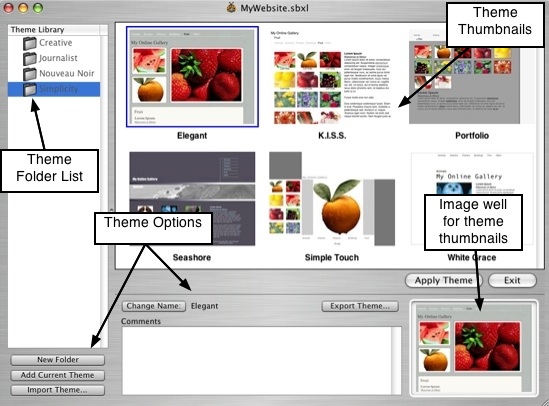
button to open the library window. The library window is divided into three main
sections:
1. The Theme Folder List - the section at the left of the window lists the themes in
alphabetical order, categorized into separate folders. You can add a New Folder to the
list by clicking the New Folder button at the bottom of interface, below the list pane.
You can edit the names of folders as well, but you can't reorder the theme folders in
the list. Clicking on a folder will display thumbnails of the themes contained within the
folder, in the larger window to the right of the folder list.
2. The Theme Thumbnails - the theme thumbnail window shows you a preview of
each theme contained in a selected folder. A thumbnail must first be selected from this
window in order to apply the theme to your site. As you click around on the different
thumbnails, you will see the thumbnail image, name, and any comments or notes you
may have added about the theme, appear at the bottom of the window. Clicking the
Apply button will apply the selected theme to your site and return you to the main
Preview window.
3. Theme Options - there are several options available at the bottom of the interface
for managing and organizing your themes. At the left bottom corner of the interface,
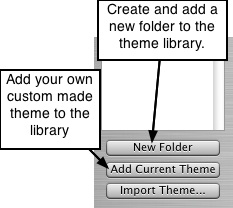
there are three options for adding new themes. You can create and name a new folder
to add your new themes to. You can add your own custom-made theme with the Add
Current Theme button, or import a theme from a source external to your ShutterBug
project. The middle section at the bottom of the interface lets you change the name of
themes in the library, add some comments to a particular theme, and export a theme
for sharing with others. Any changes or additions you make in one ShutterBug file will
also be picked up in all of your other ShutterBug files. You can also change the
thumbnail that gets displayed in the library, by dragging and dropping a screen shot
from your site, or any image you so desire, into the image well at the bottom right
corner of the interface.
───────────────────────────────────────
Apply Theme and Exit Buttons
1. Apply Theme button - When all you want to do is apply a new theme to your site,
click on any folder to view the enclosed themes. Select the desired theme thumbnail
with your mouse and hit the Apply Theme button. A panel will slide out offering two
options - you can either replace your current theme completely or add on to your
current theme. To replace your current theme, select Replace Theme. You will be
returned to the Preview window and the new theme will be applied to all pages in your
website. To add the selected theme and its templates to your current theme, select
Add Templates. You will be returned to the Preview window and the selected theme
and its templates will be added to the contents of your template drawer.
2. Exit button - You can go into the theme library just to do some tidying up and
editing if you want - you don't have to apply a new theme while you're there. Simply
make your changes to the folder list, add, delete, import or export some new themes,
edit the comments and thumbnail images, then hit the Exit button to return back to the
main Preview window. ShutterBug will update and automatically save your changes on
the fly. These changes will be reflected in the theme library for all of your ShutterBug
files.
───────────────────────────────────────
Adding, Renaming, and Deleting Themes
Adding new creations that you've just made, or a theme from a former version of
ShutterBug, is easy. ShutterBug will store your designs for as long as you want, so you
can share or use them anytime at a later date. Go to the Preview window and click the
Select Theme button to open the library window.
Add Your Custom Made Theme to the Library:
1. To create a new folder for your theme, click the New Folder button. A panel will
slide out from the top of the main window. Enter a name for the folder and hit
Create. The folder will appear in the theme library list with the specified name.
2. Click the folder with your mouse to select it. If you didn't need to create a new
folder, select an existing folder from the list where you want the theme to be saved
to. Then click the Add Current Theme button to add your custom made theme to
the selected folder.
3. The new theme will appear in the thumbnail display, placed alphabetically with the
other themes in that folder. The theme will be available from the theme library of
your other ShutterBug files as well. Note: when working with two ShutterBug files
open at the same time, you will have to save, close, and reopen the other file in
order to see the changes reflected in that file's library.
Rename the Theme, Add Comments, and Select the Thumbnail Image:
When you add a current theme, ShutterBug will automatically give it the same name as
the site file name. To change a theme name that you've just added or the name of an
existing theme in the library, follow these steps:
1. Select the desired theme thumbnail with your mouse. Then click the Change Name
button located below the thumbnail preview window. A panel will slide out from the
top of the main window.
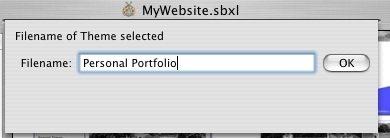
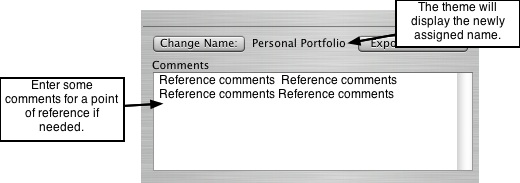
2. Input the new name into the Filename text field. Click OK to return to the main
library window. The theme name will now be changed to the newly assigned
name.
3. You may want to include some reference notes for the selected theme. Simply
enter some comments or notes into the Comments text field, if you wish. This
information will all be stored with the theme in the theme library until you change
it or delete it.
4. You can also choose to use your own thumbnail to display in the library. Why not
use a specific page from your site with your own photos to display the theme? By
default, ShutterBug will create a thumbnail snap shot of the current page you were
on when you added the Current Theme. You can easily change the thumbnail by
dragging and dropping a new image or screenshot of your site into the thumbnail
image well (the image must be 180 W x 135 H to display properly). Or you can go
back to the Preview window, select a different page in your site, and Add the
Current theme again to get a new snap shot from a different page.
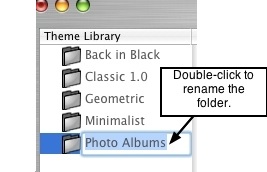
Renaming the Theme Folder Names: You can
also rename existing folders in the theme library
list - simply double-click on the folder name to
activate the text input field and enter the new
name. Then hit Enter/Return on your keyboard to
jump to the next folder's text field to give it a new
name. Hit Enter again to go to the next folder,
and continue down the list, entering new names
for each folder.
Deleting Themes:
Deleting entire folders of themes or just individual themes is easy. Simply select the
desired folder or thumbnail and hit the delete key on your keyboard. A confirmation
message will pop up before allowing the delete action to go through. Hit OK to delete
the theme or folder of themes. Hit Cancel to stop the delete action and return to the
theme library window. Recall that any changes you make in the theme library in one
ShutterBug file will also be carried across to your other ShutterBug files. If you delete
a folder or single theme from one file's library, they will also be deleted from
your other files' libraries.
───────────────────────────────────────
Importing & Exporting Themes
The Import and Export features allow you to share themes with other ShutterBug users
and import more themes into your library. Exporting a theme you have created lets you
zip up the theme for easy sharing with others. Importing a theme lets you use and
modify a theme you have downloaded from another source external to ShutterBug's
built-in library.
Import a Theme
1. From the theme library window, either select the folder to import the new theme to,
or create a new folder for the theme.
2. Hit the Import Theme button. A Finder window will open.
3. Locate the desired theme from the finder window. ShutterBug themes have a
.xlzip file extension.
4. Hit Open. The theme will be dropped into the selected folder in your library.
Alternatively, you can import a theme directly to your site by using Tools-->Import
Theme from the main menu (only available when in Preview mode). After you click the
Open button from the Finder window, a panel will slide out from the top of ShutterBug's
main application window: select whether to replace your current theme or to add on to
your current theme. The imported theme will be applied to your website immediately,
but will not be imported to your library (you would have to then add it to the library).
Export a Theme
1. From the theme library window, select the theme thumbnail you wish to export.
2. Hit the Export Theme button. A Finder window will open.
3. From the finder window, name the theme and select the desired destination on
your computer to export the theme to.
4. Hit the Export button. The theme will be exported and saved to the selected
destination.
Note: If the theme includes external files, ShutterBug will detect this, and ask you if
you would like to export the files along with the theme.
Alternatively, you can export a theme directly from your site by using Tools-->Export
Theme from the main menu (only available when in Preview mode). An Export window
will open. Name the theme and select the location on your computer to export it to. Hit
Export. The exported theme will be saved to the destination folder.
───────────────────────────────────────
Where to Get More Themes: ShutterBug Land
61 additional themes are available for free download from shutterbugland.com:
• ShutterBug Land: ShutterBug Land is a website for registered users to browse and
download more customizable themes (28). These themes are all free and will continue
to grow in number. You must be a registered user to access these themes.
• Version 1.x Themes: There are also 33 themes from former versions of ShutterBug
that are available for download from ShutterBug Land. Alternatively, when you open
your 1.x site in V2.x, you can just add the theme you are using to the new theme
library.
• ShutterBug Theme Xchange: The Theme Xchange area will also be available
from ShutterBug Land and will be used to facilitate the sharing of user themes and
posting links to your ShutterBug sites.
───────────────────────────────────────